Magnetic Paint Vision Board

Add a little dose of inspiration into your life with this simple, fun and stylish DIY project. This magnetic vision board will give you a place to keep all the images, notes and knick knacks that inspire you to follow your dreams. Your board can be any color you want, whether that means bold, neutral or pastel. Remember, if you can dream it, you can do it, so get to work! Don’t forget to send us pictures of your finished project so that we can add them to our Pinterest page!
GETTING STARTEDBefore you begin, make sure you have all the necessary tools and materials close by, and that any surfaces you’re planning to paint with MagnaMagic paints are smooth, and free of dirt and oil. Prep your workspace before you begin using a drop cloth to project your work surface. If any paint spills or splatters, wash it off with soap and water while it’s still wet to ensure an easy clean up. Have fun! |
MATERIALSLarge frameRoll of magnetic strip tapeSharpie pen or markerNeodymium magnets (not recommended for use by children)Cards, cut outs and other things to add to your completed vision board
|

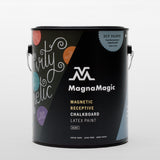
PAINTS1 quart of MagnaMagic Magnetic Receptive Primer1 quart of any latex paint color (we chose a light lavender color)
|

TOOLS1 small roller handle2 small roller brushes2 large foam brushesPaint stir sticksScissors
|

STEP 1: REMOVE BACKBOARD FROM FRAMERemove the backboard of the frame by lifting any clips or nails on the back of the frame and gently pulling the backboard away. Place the backboard down on your work surface and move the frame aside.
|

STEP 2: STIR PAINTOpen the can of paint and place it down on a flat, covered surface. Stir the paint using the stir stick until it becomes one consistent color and texture. This may take several stirs to achieve. Put the stir stick aside when you’ve finished stirring. Be careful of drips! |
STEP 3: POUR PAINT INTO ROLLER TRAYPour a small amount of paint into the tray and dip your roller into the reserve of paint at the base of the tray. Lightly roll the roller in the tray to remove excess paint.
|

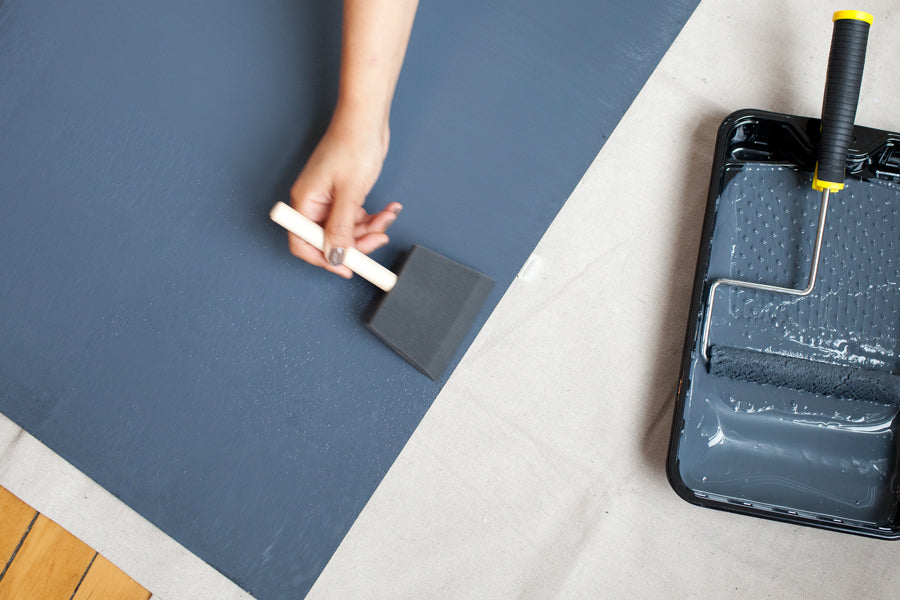
STEP 4: APPLY FIRST COAT OF MAGNETIC PAINTNow that you’ve applied paint to your roller, begin painting your surface. First, paint in one direction going up and down across the entire surface of the backboard. Then, paint in the opposite direction, going from side to side across the entire surface. When the paint is wet, this should create a look similar to crosshatching. It is important to get the painted surface as smooth as possible, so try to apply even pressure using a roller that has been well coated with magnetic paint. For more detailed instructions on painting with magnetic paint, visit our How-To guide.
|


STEP 5: USE FOAM BRUSH TO FEATHER MAGNETIC PAINTOnce you have painted in both directions, put the roller aside and use a dry foam brush to gently smooth out the painted surface. This technique is called ‘feathering.’ To feather, lightly drag a dry foam brush in one direction across the surface of the board.
|
STEP 6: ALLOW PAINT TO DRY. APPLY 2 MORE COATS.Wait for your paint to dry (approximately 30 minutes dry time between each coat) and repeat step four until you’ve achieved three full coats of magnetic paint. |
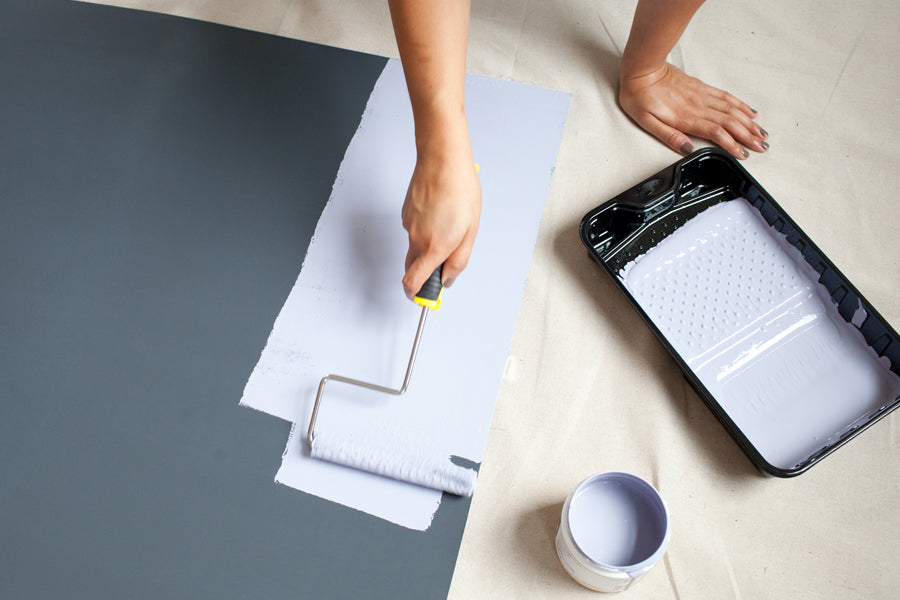
STEP 7: APPLY TOP COAT. ALLOW PAINT TO DRY.Once your magnetic paint base is dry to the touch (approximately 30 minutes after last coat), apply your top coat color until your backboard surface is evenly painted and you have achieved your desired coverage. Put your painted backboard aside and allow it to dry completely.
|
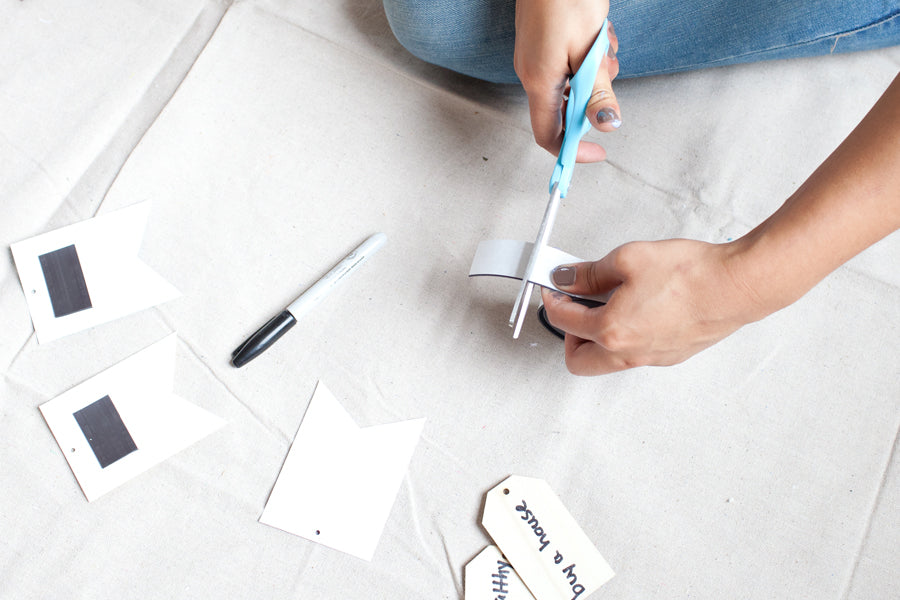
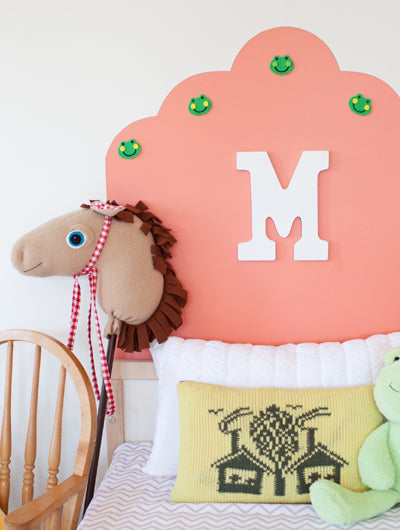
STEP 8: PREPARE YOUR VISION BOARD OBJECTSWhile your top coat dries, prepare the inspirational objects, cut outs and other items you want to appear on your vision board. For this project, we created magnets by drawing inspirational words and goals onto paper and wood tags, and applying a 1” piece of magnet strip tape to the back side of each tag. You can use strip magnet to place almost any lightweight flat object on your board, so get creative! We also carefully clipped out images and words from magazines that inspired us. Photos, postcards, notes, objects...all kinds of items can find a sweet home on your new vision board. You might be finished this step before your backboard has fully dried, so now might be a good time to eat a snack, go for a walk or visit our blog.
|


STEP 9: PLACE BACKBOARD INTO FRAME AND HANG FRAME ON WALLOnce your backboard is dry to the touch, place it back inside the frame and secure it using the clips or nails. Next, hang the frame on a wall like you normally would. |
STEP 10: ENRICH YOUR NEW VISION BOARD AND ADMIRE YOUR WORK.Grab your vision board objects and carefully arrange them on your board. Now take a step back and admire your handiwork, you’ve just created a gorgeous vision board! Don’t forget to snap a picture and send us your vision board project images so we can share what you’ve created with the world.
|


STEP 10: KEEP THE VISION GOINGCreating your vision board is just the first step with this project. Revisit your vision board daily to rejuvenate your ambitious spirit! |


Stay Connected